How to Turn a Photo Into a Coloring Page (Free Online, Canva, Procreate, Photoshop — and Which Photos Work)
There are three real ways to turn a photo into a coloring page — AI redraw, a filter in Canva/Photoshop/Procreate, or tracing — and they give very different results. Here’s which to use for which photo, the exact steps, and what makes a photo convert cleanly.
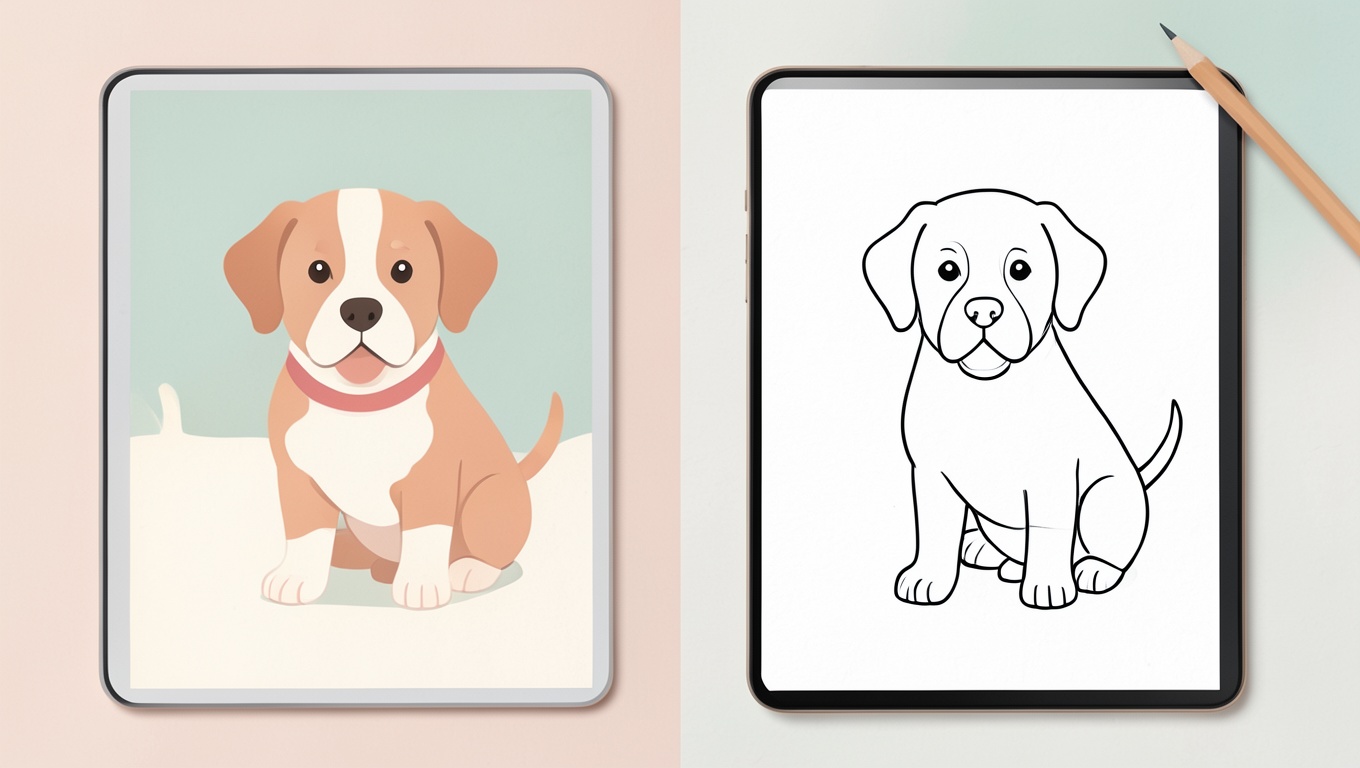
Short answer: there are three ways to turn a photo into a coloring page, and they are not interchangeable. An AI photo-to-line-art tool redraws the photo as clean outlines and gives the most “real coloring book” result on busy photos. A filter in Photoshop, Canva or Procreate (find edges + threshold) is free if you already have the software, keeps every detail faithfully, and looks noisy and grey unless the photo is simple and high-contrast. Tracing on a tablet or light box takes longest and gives the cleanest, most controllable lines. The photo you start with matters more than the method — so that’s where this guide starts.
What makes a photo convert well
Every method — AI included — works from edges and contrast. Photos that convert cleanly share a few traits:
- One clear subject that fills most of the frame: a pet, a face, a car, a house, a single flower, a child on a bike.
- A plain or blurred background. Busy foliage, crowds and patterned walls become a wall of scribble.
- Even, soft light. Harsh shadows turn into big black blobs; backlighting loses the subject entirely.
- Sharp focus and decent resolution. A crisp 3–12 megapixel photo is plenty. A cropped screenshot is not.
- Big, simple forms. Short-haired pets, smooth objects, cartoon-like toys convert beautifully. Fur, feathers, lace, grass and hair in wind turn into texture soup.
Before you do anything else, crop tight to the subject and, if you can, increase contrast slightly. Ten seconds of cropping improves every method below more than any setting inside the tool.
Method 1: AI photo-to-coloring-page tools
Newer image models don’t filter the photo; they redraw it as line art, the way an illustrator would — deciding which edges matter, simplifying textures, and producing closed, colorable shapes. That’s why they handle pets, people and outdoor photos that make filters fall apart. ColorThese has an upload-a-photo mode that does this; several other sites and apps offer the same idea.
How to get the best result from any AI converter:
- Crop to the subject and straighten the photo first.
- Use the original photo, not a screenshot or a messaging-app compressed copy.
- Generate, then look closely at faces and at anything with text or logos. AI redraws, so a likeness can drift — a pet almost always comes out recognizable; a specific person sometimes needs a second attempt or a different photo.
- If the output is too detailed for a young child, try again with a simpler crop, or ask for “simple, bold outlines” if the tool takes a prompt.
- Download the full-size file and print at 100% on letter or A4. Line weight should look like a printed coloring book — if lines are hairline-thin on paper, the source was scaled up; get the larger file.
Trade-offs: the best-looking results with the least effort, but you give up pixel-exact faithfulness — some detail will be simplified or invented. For a keepsake of a specific person, check the result honestly before printing forty copies for a party.
Method 2: Photoshop (and free equivalents like GIMP or Photopea)
The classic “find edges + threshold” approach. It’s faithful — every edge in the photo becomes a line — which is both its strength and its problem.
- Open the photo, crop, and desaturate (Image → Adjustments → Desaturate, or Black & White).
- Boost contrast a little (Levels or Curves) so the subject separates from the background.
- Find edges: Filter → Stylize → Find Edges. You’ll get a pale, sketchy outline with lots of grey.
- Force it to black and white: Image → Adjustments → Threshold. Drag the slider until the main outlines are solid black and the noise disappears. There is always a compromise point — write down the number if you’ll do more photos from the same shoot.
- Clean up: Filter → Noise → Median (1–2 px) or Dust & Scratches removes speckles; a white brush erases stray marks; Filter → Other → Minimum (1 px) thickens lines that came out too thin for crayons.
- Resize for print to about 2550 × 3300 px for letter (2480 × 3508 for A4) at 300 ppi, add a white border, and save as PNG or PDF.
A variant worth knowing: Filter Gallery → Sketch → Photocopy or Stamp gets you to a bold black-and-white look in one step, and sometimes does better than Find Edges on faces. Also the “pencil sketch” trick (duplicate layer → invert → Color Dodge blend mode → Gaussian Blur) produces a lovely grey sketch, but that’s a drawing to admire, not a coloring page — grey shading fights the crayons.
Trade-offs: free if you own the software, totally faithful, but expect to spend real time on clean-up for anything beyond a simple, high-contrast subject. Hair and fur produce noise no slider fully removes.
Method 3: Canva
Canva doesn’t have a true threshold control, so it’s the weakest of the three for clean outlines — but a lot of people already live in Canva, so here’s the honest version.
- Upload the photo, place it on a letter-size (8.5 × 11 in) or A4 design, and crop.
- Select the photo → Edit photo. Under Adjust, pull Saturation to −100 and push Contrast up.
- Open the Apps / effects panel inside the photo editor and look for a sketch or line-art style effect (the names change as Canva adds apps; “sketch,” “pencil,” “line art” and “outline” are the words to search). Apply it and raise its intensity.
- Download as PDF Print or PNG and print in black and white.
What you get is usually a soft pencil-sketch look with grey tones rather than crisp closed outlines. It’s fine for older kids and adults who don’t mind shading, and poor for toddlers, who need bold lines and white space. If you need clean lines from Canva, use it for layout — titles, borders, assembling a booklet — and make the line art with one of the other two methods first.
Method 4: Tracing in Procreate (or any drawing app)
If you have an iPad and Procreate (or a similar app), tracing gives the cleanest coloring page and lets you decide what to keep.
- Create a canvas at 2550 × 3300 px, 300 dpi (letter) or 2480 × 3508 (A4).
- Insert the photo, scale it to fill, and drop its layer opacity to about 30–40%.
- Add a new layer on top. Use a smooth, pressure-insensitive inking brush — Monoline or Studio Pen — at roughly 8–14 px for main outlines, thinner for interior details.
- Trace the big shapes first, then the details you actually want. Skip texture. Close every shape so it can be colored in.
- Hide the photo layer, check the drawing on a white background, then export as PNG.
A no-tablet alternative: print the photo lightly (or at reduced contrast), lay a plain sheet over it on a window or a light box, and trace with a fine black marker. Scan or photograph the tracing, push it to pure black and white with a threshold (see Method 2), and print.
Trade-offs: slowest, but you control exactly how simple or detailed the page is, which is what makes it best for toddler pages and for personalized keepsakes.
Which method should you use?
| You want… | Use |
|---|---|
| A quick coloring page from a pet or family photo | AI converter, then check the likeness |
| Exact faithfulness to a simple, high-contrast photo | Photoshop/GIMP find edges + threshold |
| A page a 2–4-year-old can actually color | Trace it, keeping only big shapes |
| A whole personalized booklet for a gift or a party | AI or tracing for the pages; Canva for the layout |
| A sketchy, shaded “art print” look | Photoshop pencil-sketch effect or Canva sketch effects (not ideal for coloring) |
Finishing the page for print
- Size it properly: 2550 × 3300 px (letter) or 2480 × 3508 px (A4). Smaller files print soft.
- Leave a margin of about 0.5 in / 12 mm so the printer’s unprintable edge doesn’t clip the drawing.
- Thicken hairline outlines (Minimum filter in Photoshop, or a heavier brush when tracing). Coloring-book lines are typically 2–4 pt at print size.
- Remove grey: a final Threshold pass guarantees pure black on pure white, which prints cleanest and colors best.
- Save as PNG or PDF, not JPEG, to avoid halos around the lines — and see how to print coloring pages without blurry lines for the printer settings.
A note on other people’s photos
Converting your own photos is your business. If you upload photos of other people — especially children who aren’t yours — ask first, and be thoughtful about which services you upload them to. A birthday-party booklet made from the guests’ photos is a lovely idea; it’s also one to run past the other parents.
Frequently asked questions
Is there a free way to turn a photo into a coloring page?
Yes. GIMP and Photopea are free and do the find-edges-and-threshold method; many AI converters, including ours, offer free conversions; and tracing costs nothing but time. The quality ranking is roughly: tracing and good AI at the top, Photoshop-style filters next, Canva effects last.
Why does my converted photo look grey and messy?
Because a filter kept every edge and every tonal change. Push it through a Threshold to force black and white, remove speckle with a Median filter, and — more importantly — start with a tighter crop and a plainer background.
Can I turn a photo into a coloring page on my phone?
Yes: upload to a web-based AI converter from the phone browser, or use a photo editor app with a threshold/“stamp” style effect. Crop tightly first. Download the full-size result before printing (see our printing guide for phone steps).
What resolution do I need?
For a full letter-size page, aim for a final file of about 2550 × 3300 pixels. Any reasonable phone photo has enough resolution; the problem is usually that a screenshot or a messaging-app copy was used instead of the original.
Does Crayola have a photo-to-coloring-page tool?
Crayola has offered photo-based apps and tools at different times, and the lineup changes; check the current app store listing. Whatever you use, the same rules apply: tight crop, plain background, full-size file, print at 100%.
Once you have a page you like, the next question is usually paper and markers — see best paper for coloring pages. And if you’d rather start from a prompt than a photo, our free coloring pages library has a few thousand to browse.