How to Blend Colored Pencils: Burnishing, Solvent, Baby Oil and What Actually Works on Printer Paper
Burnishing, a colorless blender, odorless mineral spirits, baby oil, Vaseline, a Q-tip — some of these blend beautifully and some wreck printer paper. Here’s what each one actually does, ranked for ordinary printed coloring pages.
Short answer: on ordinary printer paper, the blending methods that work best are — in this order — layering the pencils themselves (overlapping light layers), burnishing with a white or colorless blender pencil, and, if you want the smoothest look, a small amount of odorless mineral spirits on a cotton swab, used only on heavier paper. Baby oil and Vaseline do blend wax pencils, but on thin paper they soak through, leave a translucent greasy halo, and stop you adding more color. Q-tips and tissue on their own do very little with dry pencil. Details, steps and the honest trade-offs follow.
What “blending” is actually doing
Colored pencil is pigment in a wax or oil binder sitting in the paper’s texture. Blending is any method that makes the transition between two colors, or between layers, look continuous. There are only three ways to do it: optical (overlapping layers so your eye mixes them), mechanical (pressure that crushes the paper tooth and smears the binder — burnishing), and chemical (a solvent that dissolves the binder so pigment flows). Every product and trick on the internet is one of those three.
Method 1: Blend with the pencils (optical layering)
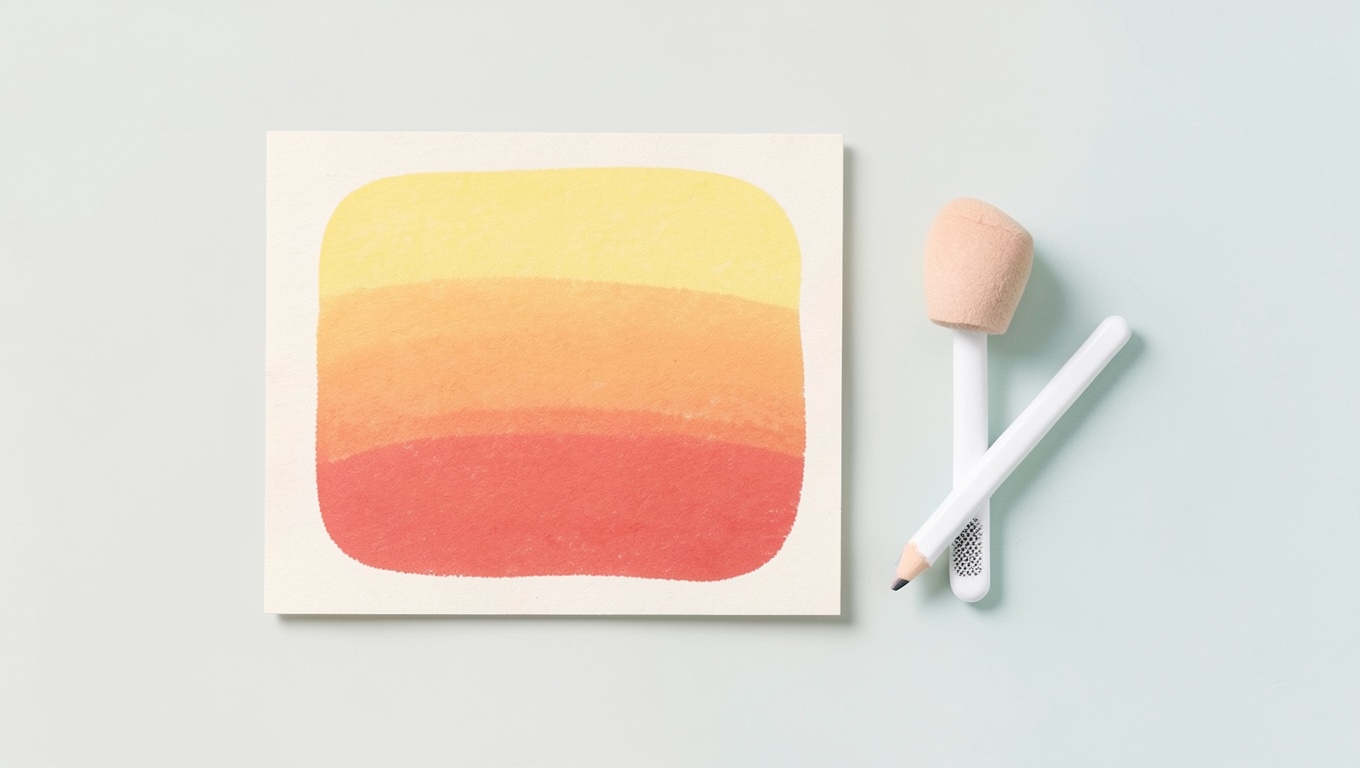
This is the foundation and, on printer paper, the one you’ll use most. To blend yellow into red:
- Lay a light layer of yellow over the whole area.
- Add orange over the right two-thirds, lighter where it meets the yellow.
- Add red over the right third, feathering it leftwards with strokes that get lighter and sparser.
- Go back with yellow over the whole thing, lightly, to pull everything together. Repeat the sequence once more with slightly firmer pressure.
The trick is to feather each color into the next — strokes that get lighter and further apart — rather than stopping at a hard edge. Three light passes of the whole sequence blend far better than one heavy pass. If you’re new to layering, our beginner’s guide to colored pencils covers pressure and point control first.
Works on: any paper, including thin copy paper. Limit: some paper texture always shows; for a glassy-smooth gradient you add one of the next two.
Method 2: Burnishing (colorless blender, white pencil, or the lightest color)
Once the layers are down, go over the area with firm pressure in small circles using a colorless blender pencil (a pencil of binder with no pigment), a white pencil, or the lightest color already in the area. The pressure flattens the tooth and smears the layers together; the surface goes slightly shiny and the white specks disappear.
- Colorless blender: blends without shifting the color. Best general choice.
- White pencil: blends and lightens slightly — lovely for highlights, can make darks look milky.
- Lightest color in the area: blends and unifies, keeps the hue true. Free — you already own it.
Works on: printer paper, but it will emboss and can ripple thin sheets; 28–32 lb or cardstock burnishes more comfortably. Limit: do it last — a burnished surface takes very little additional color. Wax pencils can develop a faint cloudy film (wax bloom) a day later; a gentle wipe with a soft tissue removes it.
Method 3: Solvent — odorless mineral spirits (the smoothest blend)
Odorless mineral spirits (Gamsol, Mona Lisa, or a hardware-store “odorless” thinner) dissolve the binder so pigment flows into the tooth, giving a painted, seamless look.
- Lay your colors down first — solvent spreads what is there, it doesn’t add color. Two or three light layers is enough; too little pigment and it just goes pale.
- Dip a cotton swab, a paper stump, or a small synthetic brush in the spirits and blot it almost dry on a paper towel. The swab should be damp, not wet.
- Work from light to dark in small circles. Rinse or swap swabs when moving to a new color family.
- Let it dry completely (a few minutes). You can then layer more pencil on top — solvent blending doesn’t seal the surface the way burnishing does.
Works on: cardstock and 28–32 lb paper. On thin copy paper, be stingy: too much solvent soaks through, buckles the sheet, and can make the back translucent. Ventilate — “odorless” isn’t odor-free. Keep it off the black printed outline; some inkjet blacks will smear a little.
Rubbing alcohol (isopropyl) works too, less smoothly and with more risk of lifting pigment; 70% is gentler than 91%. It is a reasonable stand-in if you don’t own mineral spirits.
Method 4: Baby oil and Vaseline — they work, with real downsides
These are all over social media because they’re in every bathroom. Both dissolve wax binder, so they do blend wax-based pencils (Prismacolor, Crayola and similar). The problems:
- They don’t evaporate. Mineral spirits flash off; oil stays in the paper for good. The area stays slightly greasy, can yellow over time, and resists further layers of pencil.
- On thin paper they soak through and leave a translucent, oily halo on the back and sometimes beyond the edge of the shape.
- Vaseline sits on top and picks up dust; it’s a mess to handle next to unblended areas.
If you still want to try it, use a tiny amount of baby oil on a swab, on cardstock, on a page you consider finished, and keep it well inside the outlines. For a keepsake or anything going in a frame, use mineral spirits or burnish instead.
Method 5: Dry tools — Q-tips, tissue, paper stumps
On their own, dry swabs and tissue barely move dry colored pencil; they smudge graphite and pastel, not wax. They are useful as carriers for solvent (above) and a paper stump can soften an edge slightly on very soft pencils. If someone tells you to “just blend with a Q-tip,” they mean with something on it.
What about water?
Water only works with watercolor pencils, which have a water-soluble binder. On regular pencils it does nothing but cockle the paper. If you have watercolor pencils and want to use water on a printed page, print on your heaviest cardstock, keep the brush barely damp, and accept some buckling — copy paper is not made for it.
The ranking, for printed coloring pages specifically
| Method | Smoothness | Safe on thin copy paper? | Can you add more color after? |
|---|---|---|---|
| Layering the pencils | Good | Yes | Yes |
| Burnishing (blender / white / light color) | Very good | Yes, with care | Barely |
| Odorless mineral spirits | Excellent | Small amounts only | Yes |
| Rubbing alcohol | Good | Small amounts only | Yes |
| Baby oil / Vaseline | Good | No — soaks through | No |
| Dry Q-tip / tissue | Minimal | Yes | Yes |
A practice page
Print something with a few large, simple areas — our heart coloring pages or a big mandala work well. In the first shape, blend two colors with layering only. In the second, the same two colors, then burnish. In the third, the same again, then a barely-damp swab of mineral spirits. Label them on the back. Seeing the three side by side on the paper you actually use teaches more than any video.
Frequently asked questions
How do you blend colored pencils without a blender pencil?
Layer the colors with feathered, overlapping strokes, then burnish with the lightest color in the area or a white pencil. For a smoother finish, a barely-damp swab of odorless mineral spirits.
Can you blend colored pencils with Vaseline or baby oil?
Yes, on wax-based pencils — but the oil never dries, soaks through thin paper and stops further layering. Use it sparingly on cardstock, or choose mineral spirits instead.
Does rubbing alcohol blend colored pencils?
Yes, reasonably well; it’s harsher than mineral spirits and can lift some pigment. Use 70%, blot the swab nearly dry, and work in small areas.
Why does my blend look muddy?
Too many unrelated colors in one spot, or too much solvent moving pigment around. Stick to two or three neighboring hues per gradient, and keep the swab nearly dry.
What’s the easiest blending method for beginners?
Layering plus a white-pencil burnish. No extra products, nothing to spill, and it works on any paper you can print on.
Paper makes a difference to all of this — the smoother and heavier, the better every method behaves. Our paper guide has the weights that feed through a home printer.